Maple Trunk Chopping
Probably the most utilized technique in bonsai is the trunk chop. It is no secret that chopping down a larger tree into a smaller tree will allow for a larger trunk quicker while allowing for the formation of taper into the regrown trunk extension. Sounds easy enough, but a good chop will be unnoticed in future years while a poor chop will be seen straight away. It is an easy thing to do so it is a technique that allows for practise to make one better.
This article will focus on the acer species, but can be utilized for many hardwood deciduous species also. Maple trees respond well to the chop with tridents being the best for the job. Their ability to bounce back quick, stretch and allow bark to flow, and cane extension to build fast makes them the best to get ones feet wet with. It is not uncommon to take a pencil size whip to 1.5 inches in a year or two.
I have many high-end bonsai books, many on classical shohin and Kokufu books. While looking thru the pictures of these trees the predominate shape seems to be a classical pine tree styled maple tree. What is a pine tree styled maple?

All drawings by the author
This shape is the classical Japanese Moyogi style more often referred too as informal upright. The large fat trunk sweeps up back and forth to a point while the branches collect at the outsides of the trunk bends. Large basel flare adds power and the tree is very compact and stout. A very masculine tree. Here are some images of the Classical Moyogi.

Photo by Bonsai Tonight

Photo by Bonsai Tonight

Photo by Bonsai Tonight
The defining factor in this shape is that all the branches tend to be horizontal which is counter to the way maples actually grow. Maple branches tend to grow upright and reach for the sky, more like the apex in the last tree. Many times the outline of the canopy will be pointed, like a young pine tree. The first two examples show this. The third tree has a more rounded canopy which helps soften the image and makes the tree seem more mature.
The other style is more often associated with how a maple tree actually grows. It too is an informal upright but much less classical and can be of very abstract design. It may be a more slant style or classical in trunk shape but will have more upright growing branches, more akin to how maples grow. The most often seen maple image done in this style is the clump form. This form incorporates many trunks from a central point at the base.
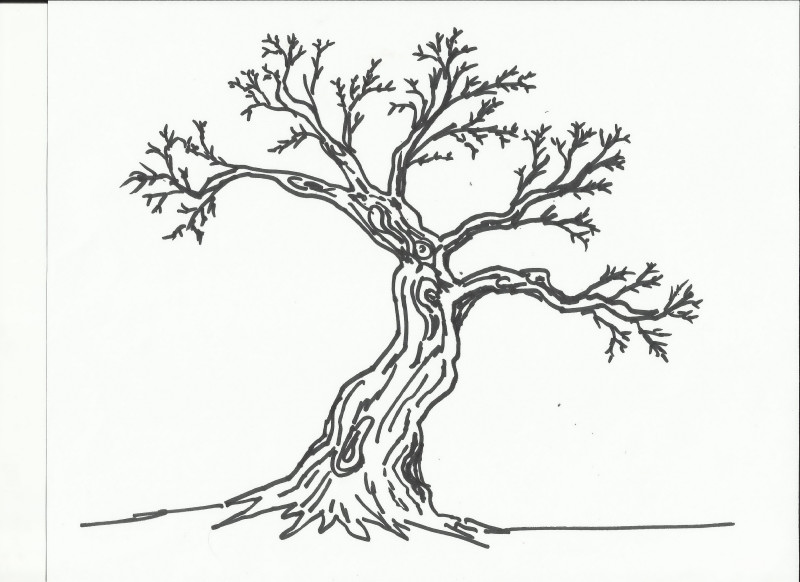
In this image we see a curving trunk with great taper, but the branches are not horizontal, they grow much more upright than those trees above. How might some trees look when styled like this in the bonsai pot?

Photo by Bonsai Tonight

Photo by Bonsai Tonight

Photo by Bonsai Tonight

Photo by Bonsai Tonight

Photo by Peter Tea
The clump form is more predominate in the pictures, but the canopy can be seen as free and growing upright as it would in nature. The fourth picture shows a broom style maple which is also an often associated form for this tree.
So how might a tree be chopped to accommodate either of these forms? For the Moyogi style the chop is very easily done and makes a nice tree fairly fast. The reason for this is that the tree we’re starting with is much larger than for the other form. 4 to 8 years old material can be used with older material making a much larger tree. The stock is grown for a few years at an angle. This is important, because the tree will exit the soil at an angle, and the root base needs to get oriented to look stable as the years go by.
The tree is beheaded at a suitable branch. Keep in mind that this branch should be on the same side as the lean of the tree. This will become the first branch down the road. Even if this branch is not in exactly the correct place it should be utilized to keep the trunk alive by pulling nutrition to that area. A suitable branch can be grafted easily into place when it becomes necessary. When the chop buds, it is important to choose the new leader correctly. Allow all buds to grow a couple months and select the best placed one growing in the opposite direction. This will make the first direction change. Allow this leader to grow strong all year. Keep any lower secondaries that emerge but above that first six or so inches one can keep branches off the leader allowing the leader to just elongate and build wood. Be aware that at some time the trunk will need to be chopped again for another directional change so working to have a suitable branch to chop to is paramount.

The drawings to not reflect branches left at the chops for clarity. Grafting is also a suitable method for gaining a branch where it is needed. If possible, time chops to be done each year if the tree has grown to a suitable girth to blend in with trunk below previous chop. If still under sized hold off the next chop until it has been reached the correct size, other wise the trunk will not blend well.

When the time is right that next chop can be made hopefully to a good branch to help with keeping the trunk healthy. At this time branching should be going along well and secondaries and tertiary branching may even be developing on that first branch. Don’t forget to build in back branching to help with depth of field, keeping in mind that these can be accomplished easily with thread or approach grafts. I prefer approach grafts simply because they take fast and seem to build girth faster. Thread grafts are better in appearance since they exit the trunk in the middle and do not come off the trunk at a funny angle. Approach grafts also can make some callous build up also.

The other Moyogi style is much more loose, and more feminine in feel. It is softer and has a lighter feel because of the upright nature of the branching. This style takes much more time to build. This is because there in no way to get the movement into the trunk when the stock is older. In the above style the beginning material is pretty much bone straight. This tree needs to have the movement grown into it from an early age.
Starting with liner material, wire a sapling and give it some movement. It can much more exaggerated since a lot of it will come out as it grows. This would be a good time to grow it on a plate in the ground helping to build a good flaring buttress early since all one can do is watch it grow. Keep branching to a minimum and allow all the growth to go straight up. Also keep in mind this tree will probably be in a box or the ground for at least 5 years, just to gain the necessary girth for the initial chop. Water and fertilize heavily.

Allow one branch on the lean side to develop keeping in mind where it is in relation to the first chop. This is where we will chop to. Leave all the growth on the tree thru winter and make the chop in spring just as the buds break. The chop should be made a couple inches above the first branch. Seal well. This long stub that is left is to keep the area from drying out. Allow branching to grow above the first branch unhindered all year.

The next year after the trunk has gained good girth the tree is chopped back much closer to the first branch so we can make a directional change. The trunk should be made to move back over itself to get the weight of the tree back over to root mass. This shoot will grow for up to 3 to 5 years so as to even out the scar and make the trunk seamless. Branching should be chosen to fulfill the canopy now.

Over the next few years, secondary and tertiary branching can be built using the hedging method to build twigs. The chop lines below show where chops will have been made during the tapering phase and subsequent choosing of branches along the way. One should not confuse this with chopping if the trunk is that well developed.

This is by no means the straight dope on making maple bonsai. The second method could contain secondary trunks and Mother Daughter configurations to help add dynamism to the imagery. This is intended to be a starting point with the ending being limited only by your own imagination.
Speaking of starting points, I felt that adding a project to this thread could be beneficial. I acquired this tree thru a dig at a growing field. It is large, being about 4 inches across the trunk above the flare. The tree stands about 32 inches tall.

The tree has been around for a decade and I took a large layer off the top leaving a blunt ended trunk with a dicy future.

I had a plan and took it down a little farther. I would have to get some kind of tree look into this shorter stubby trunk with rather bad branching as it never received any training except pruning to walk by it. I used my arbor tech to prune away some of the wood between the branches in an effort to lighten the top some.


As I get towards the perceived front, my carving gets much deeper and I try to carve in some needed taper into the blocky trunk.


I begin to remove all the stuff I know I don’t need and wire what I do need.

The branches tend to be short and stubby, and this is due to pruning the tree as it sits around at the perimeter of walking paths and needs pruning just to safely walk. I turn up everything that will move on the tree. many of the branches are large and stiff and though I can’t get the base of the branch to move I can wire up all the smaller shoots off of these larger branches.

This tree to me always seemed to be much more upright in nature and I still find it odd that somehow I managed to plant it with some movement in that trunk.

I think that the work I will do to this in future posts will help out in how to convey that second trunk method for maples. Not that they have to have this huge wound in the front, but just the idea of how to develop more upward branching.

Spring is a little stalled right now, and most of the leaf movement has stopped due to a cold spell. I know the heat is coming soon. Just relaxing till that time.


Great post, great illustrations, pictures and drawings. Thanks!
LikeLike
Awesome post Al. I’ll file this away for the future.
LikeLike
Great! thanks!!!
LikeLike
Excellent! Thanks, Al. I have a trident and a couple Japanese maples that I am growing out. The trident was slipped into a pond basket this year, but I haven’t seen the growth I was expecting. Needs more fertilizer and a little more shade I think. The Japanese maples are in little pots, but next year I’m going to put them in grow boxes or the ground. This post is going to be invaluable for developing these.
LikeLike
Great post! Can i use this for a dwarf jade / podo carpus please? I have seen online that not all trees survive this cut? Or is this not true?
LikeLike
I have no experience with either of those species. I have cut dwarf jade in some succulent pots that my wife keeps, not bonsai but they respond well to chops. At least chops to shorten them. The scar lasts a long time. Never cut a Buddah pine.
LikeLike
Thanks for the information. Presented in a easy to understand manner with good illustrations.
LikeLike
This article needs to discuss different techniques for different maple species.
If you made the first trunk chop as you’ve illustrated on a Japanese maple, I can say with 100% confidence that the trunk dies all the way back to the roots on the side opposite the branch. This same chop would probably be ok on a trident however.
For JM to avoid dieback, you must either chop diagonally between 2 branches on opposite sides, or saw out a wedge, leaving a portion of trunk intact on the side without a branch. You can complete the cut a year or two later.
LikeLike
Thanks for the heads up. I work on both and I have never experienced this problem. Must be your technique.
LikeLike
Yes I have also never encountered dieback on any JM’s like you describe. A little dieback maybe down to the next bud or branch at worst! Refine that technique if you get death down to the roots! Hope the family tree isn’t a JM. Jk
LikeLike
Pingback: Colorado Bonsai – Maple Trunk Chopping – Colorado Rocky Mountain Bonsai – Suiseki
I live in Indiana and have been looking for some basic tips to get started with the many native maple trees in our woods, but the Information is very hard to find. This is an excellent resource and I appreciate the time and care you took in putting this together.
LikeLike
Thank you for the nice words. It takes a lot of work but I find that there are many web sites out there by professionals and not alot for the average backyard bonsai enthusiast. I just try to fill a need of how to get going with some work over the years that I was fortunate enough to photograph!
Enjoy, Al
LikeLike